
You just discovered unexpected paint marks on your vinyl seats? Don’t worry, It’s a common situation that can be quite frustrating. Whether the result of a DIY project or an accidental spill, dealing with paint on your vinyl seats might leave you confused. But don’t worry, this guide is here to help. We’ll take you through an easy-to-follow process, breaking down each step, to assist you in effectively eliminating those paint stains without the need for professional intervention.
No need for complex tools, just gather some everyday items and a bit of patience. As you continue reading, you’ll gain the confidence and know-how to restore your vinyl seats to their original condition. So, let’s jump in and reclaim your seats from those unwanted paint stains!
Also Read: How to Remove Paint From Chrome
Supplies Needed for Paint Removal From Your Vinyl Seats:
Before we start the process of paint removal, let’s ensure you’re equipped with the right tools. Here’s an important list of essential supplies you’ll require:
- Gentle Dish Soap: Choose a mild dish soap that won’t harm the vinyl.
- Warm Water: You’ll use this to create a gentle cleaning solution.
- Soft Microfiber Cloth: A soft cloth minimizes the risk of scratching while cleaning.
- Plastic Scraper: Utilize a plastic scraper with rounded edges to delicately lift paint.
- Isopropyl Alcohol: An effective liquid to fight against stubborn paint stains.
- Cotton Balls or Swabs: Ideal for precision application of isopropyl alcohol.
- Clean Water: Essential for rinsing and wiping down the seats post-cleaning.
Preventive Measures to Safeguard Your Vinyl Seats:

Proactive protection is invaluable in keeping your vinyl seats paint-free. Here are some preventive measures to consider:
- Covering: Shield your seats with cloth or plastic when engaging in painting projects to avoid unintended splatters.
- Taping: Utilize painter’s tape to safeguard seats while working on nearby surfaces.
- Clear Work Area: Maintain a neat workspace to diminish spill and accident risks.
- Prompt Action: Swiftly address spills; the longer paint stays, the tougher its removal becomes.
- Test Prior: Prior to utilizing any cleaning agents, conduct a patch test on an inconspicuous vinyl area to ensure no harm is inflicted.
Equipped with these supplies and preventive insights, you’re ready for successful paint removal, reviving your vinyl seats like before.
Also Read: How to Remove Paint From Stone
Using Rubbing Alcohol for Paint Removal:
When it comes to tackling paint stains on your vinyl seats, rubbing alcohol can be your secret weapon. This powerful and gentle solution will effectively lift paint marks without causing harm to your seats. Here’s a simple guide on how to use rubbing alcohol for paint removal:
- Prepare Your Supplies: You’ll need rubbing alcohol, a soft cloth, and cotton balls or swabs.
- Test a Small Area: Before diving in, test the rubbing alcohol on a small spot of your vinyl seats to ensure it doesn’t cause any discoloration or damage.
- Apply Rubbing Alcohol: Moisten a cotton ball or swab with rubbing alcohol. Gently dab the paint stain, avoiding excessive rubbing to prevent spreading.
- Blot and Lift: After a minute or two, gently blot the area with a soft cloth. You’ll notice the paint transferring onto the cloth. Repeat as needed until the stain lightens.
- Cleanse and Rinse: Dampen a cloth with clean water and wipe down the treated area to remove any residue. This step ensures the rubbing alcohol is fully removed.
- Dry and Assess: Allow the area to air dry. Once dry, check if the paint stain is completely gone. If needed, you can repeat the process.
- Finish with Care: After successful removal, clean the entire vinyl seat with a mild dish soap and warm water solution. This ensures a consistent appearance.
By using rubbing alcohol and following these steps, you’ll be amazed at how effectively you can remove those unwanted paint marks on your vinyl seats.
Using a Heat Gun for Paint Removal from Vinyl Seats:
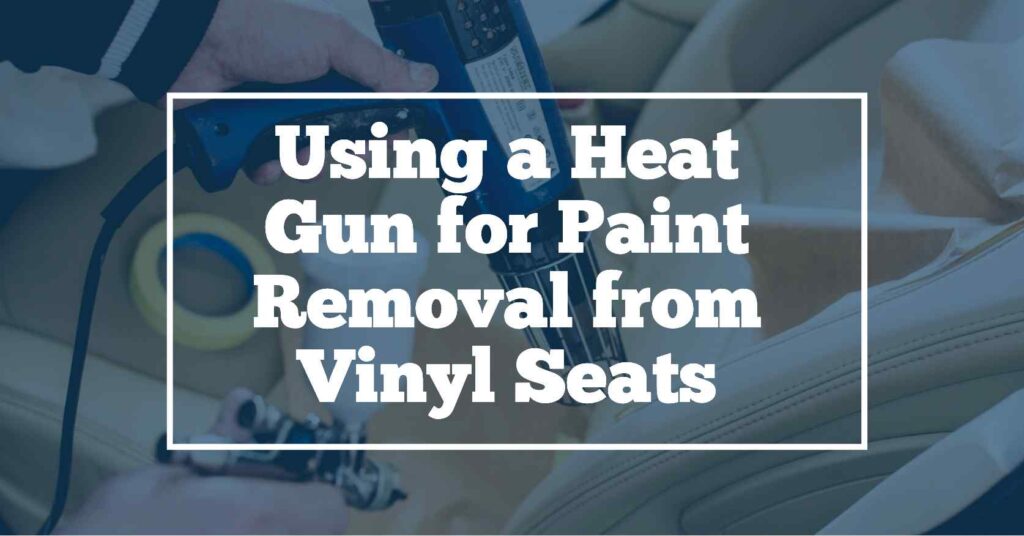
If you’re facing the challenge of paint stains on your vinyl seats, a heat gun can be a good tool for the task. With careful application, this tool can help soften and remove paint without harming the vinyl. Here’s a easy to follow guide on using a heat gun for paint removal:
- Prepare Your Tools: You’ll need a heat gun, a plastic scraper with rounded edges, and a soft cloth.
- Prepare the Area: Work in a well-ventilated space, ensuring there are no flammable materials nearby. Lay a cloth or cardboard under the area you’ll be treating to catch any paint residue.
- Test on Low Setting: Before you start, test the heat gun on a small part of the vinyl at a low setting. This helps you analyze the heat’s effect on the material.
- Heat the Paint: Set the heat gun to a low setting and hold it a few inches away from the paint stain. Keep the heat moving back and forth, never concentrating on one spot for too long. As the paint softens, you’ll notice it becoming slightly bubbly.
- Gently Scrape: Using the plastic scraper, gently lift the softened paint. Be cautious not to scratch the vinyl. If the paint isn’t coming off easily, continue applying heat and gently scraping.
- Wipe Clean: Once the paint is removed, use a soft cloth to wipe away any residue. You might also want to use a mild dish soap and water solution to clean the area thoroughly.
- Assess and Repeat if Necessary: Check the treated area. If any paint remains, you can repeat the process until the seat is clean.
- Cool Down: Allow the vinyl to cool down after using the heat gun before using or sitting on it.
By following these steps and handling the heat gun with care, you can effectively remove paint from your vinyl seats, restoring their appearance.
Removing Paint from Vinyl Seats Using Dish Soap:
When encountered with paint stains on your vinyl seats, simple household items can often come to the rescue. Dish soap, with its gentle and effective cleaning properties, can be your good-to-go resource for removing paint from vinyl seats. Here’s a straightforward guide on how to use dish soap to remove paint stains from vinyl seats:
- Prepare Your Supplies: You’ll need mild dish soap, warm water, a soft cloth, and a plastic scraper.
- Create a Cleaning Solution: Mix a small amount of mild dish soap with warm water to create a gentle cleaning solution.
- Test on a Small Spot: Before proceeding, test the cleaning solution on an inconspicuous area of the vinyl to ensure it doesn’t cause any discoloration.
- Apply the Solution: Dampen the soft cloth with the cleaning solution and gently blot the paint stain. Avoid excessive rubbing to prevent the spreading of the paint.
- Gently Scrub: If the paint stain is stubborn, use a soft cloth to gently scrub the area. Remember to maintain a light touch to avoid damaging the vinyl.
- Scrape if Necessary: If the paint is raised, you can use a plastic scraper with rounded edges to gently lift it. Avoid using excessive force to prevent scratching the vinyl.
- Rinse and Dry: After successfully removing the paint, dampen a clean cloth with plain water and wipe down the treated area to remove any residue. Then, use a dry cloth to pat the area dry.
- Assess and Repeat: Check the area to ensure the paint is completely removed. If needed, you can repeat the process until the seat is clean.
- Finish with a Rinse: Once you’re satisfied, wipe down the entire vinyl seat with a cloth dampened with clean water to remove any soap residue. This ensures a uniform appearance.
By utilizing the power of dish soap and following the above steps, you can remove those paint stains on your vinyl seats, restoring their charm and ensuring a comfortable ride for years to come.
Using a Commercial Paint Remover for Vinyl Seats:
When facing stubborn paint stains on your vinyl seats, a commercial paint remover can be an effective solution. These specialized products are designed to tackle tough stains without damaging the vinyl. Here’s a guide on using a commercial paint remover for your vinyl seats:
- Select a Suitable Remover: Choose a commercial paint remover that’s safe for use on vinyl surfaces. Read the product label and instructions carefully.
- Prepare the Area: Work in a well-ventilated space and cover the surrounding area to prevent any accidental spills or splatters.
- Test on a Hidden Spot: Before you begin, apply a small amount of the paint remover to an inconspicuous area of the vinyl to ensure it doesn’t cause any adverse reactions.
- Apply the Remover: Following the product instructions, apply the paint remover to the stained area. Use a soft cloth or sponge to gently work the product into the paint stain.
- Let It Sit: Allow the paint remover to sit on the stain for the specified time mentioned on the product label. This allows the remover to break down the paint.
- Gently Scrub or Wipe: Depending on the remover’s instructions, use a soft cloth or a gentle scrubbing pad to wipe away the paint. Always follow the recommended technique to avoid damaging the vinyl.
- Rinse and Clean: After removing the paint, rinse the treated area thoroughly with clean water. This step ensures that any residue from the remover is completely removed.
- Assess and Repeat if Needed: Check the treated area to see if the paint is completely gone. If anything remains, you may need to repeat the process.
- Conditioning (if applicable): Some commercial removers may require you to condition the vinyl after paint removal. If so, follow the recommended steps to maintain the vinyl’s quality.
- Finish with a Wipe Down: Once you’re satisfied with the results, wipe down the entire vinyl seat with a damp cloth to ensure consistency in appearance.
By following these steps and adhering to the product instructions, you can effectively use a commercial paint remover to restore your vinyl seats to their original condition, making them look as good as new.
Using Acetone to Remove Paint from Vinyl Seats:
Acetone is a powerful solvent that can be used to remove paint stains from vinyl seats. However, caution is key when using it due to its potency. Here’s a friendly guide on utilizing acetone for paint removal:
- Get Ready With Your Supplies: You’ll need acetone, cotton balls or swabs, a soft cloth, and gloves to protect your hands.
- Ventilate the Area: Ensure you’re working in a well-ventilated space to avoid inhaling fumes.
- Test on a Hidden Spot: Before proceeding, test acetone on an inconspicuous area of the vinyl to check for any adverse reactions.
- Wear Gloves: Put on gloves to protect your skin from direct contact with acetone.
- Apply Acetone Carefully: Dampen a cotton ball or swab with acetone. Gently dab the paint stain, ensuring not to oversaturate the vinyl.
- Blot and Lift: Allow acetone to sit on the paint stain for a short period, then gently blot the area with a soft cloth. The paint should start transferring onto the cloth.
- Repeat as Necessary: If the stain persists, repeat the process until the paint is lifted.
- Rinse and Wipe: Once the paint is removed, dampen a clean cloth with water and wipe down the treated area to remove residual acetone.
- Assess and Finish: Check the treated area. If needed, clean the entire seat with a mild dish soap and water solution to ensure a uniform look.
- Dispose Properly: Dispose of used cotton balls, swabs, and cloths that have come into contact with acetone responsibly.
Remember, acetone is potent, so use it cautiously and sparingly. With careful application and adherence to safety precautions, you can successfully use acetone to remove paint stains from your vinyl seats.
Simple Cleaning and Conditioning for Your Vinyl Seats:
Maintaining your vinyl seats is a breeze with a smart routine. Begin by gently wiping them down using a mix of mild dish soap and warm water with a soft cloth. Rinse with a damp cloth and then dry with another cloth. For added care, grab a vinyl conditioner designed for cars or furniture. Apply a little onto a clean cloth and gently rub it onto the seats in circular motions. Let it sit for a bit, then buff it with a dry cloth for a subtle shine. By sticking to this routine, your vinyl seats will stay cozy and look their best, keeping you cruising comfortably.
Preventive Measures for Vinyl Seat Care:
Taking a few precautions can go a long way in preserving the quality and appearance of your vinyl seats. Here are some simple yet effective preventive measures to consider:
- Regular Cleaning: Make a habit of cleaning your vinyl seats regularly using a mild soap and water solution. This prevents dirt buildup and maintains their originality.
- Avoid Direct Sunlight: Prolonged exposure to direct sunlight can cause vinyl to fade and crack over time. Whenever possible, park your vehicle in shaded areas or use sunshades to protect the seats.
- Use Seat Covers: Consider using removable seat covers, especially if your vehicle is exposed to heavy use or transport of pets, to shield the vinyl from potential scratches and stains.
- Wipe Spills Promptly: Accidental spills can happen. Wipe up any spills or stains immediately with a clean cloth to prevent them from setting in and causing damage.
- Be Mindful of Sharp Objects: Avoid placing sharp objects on your vinyl seats, as they can easily puncture or scratch the surface. Encourage passengers to be cautious with items like keys, pens, or tools.
- Regular Conditioning: Periodically apply a vinyl conditioner to your seats to keep the material supple and prevent it from drying out or cracking.
- Use Seat Belts Properly: Ensure that seat belts are used correctly to avoid unnecessary friction against the seats, which can lead to wear and tear.
- Regular Inspection: Take a moment to inspect your vinyl seats for any signs of damage, such as tears, cracks, or discoloration. Catching issues early can prevent them from worsening.
By incorporating these preventive measures into your routine, you can extend the life of your vinyl seats and enjoy their comfort and appeal for years to come.
Frequently Asked Questions (FAQs) about Removing Paint from Vinyl Seats:
- Can I use household products like nail polish remover or vinegar to remove paint from vinyl seats? While household items might seem like a quick fix, they can potentially damage the vinyl. It’s safer to use products specifically designed for paint removal on vinyl surfaces.
- Is it safe to use a heat gun on vinyl seats to remove paint? Yes, a heat gun can be used to soften paint for removal, but caution is necessary. Keep the heat moving to avoid damaging the vinyl, and always test on an inconspicuous area first.
- What if the paint stain is old and stubborn? Old paint stains can be more challenging to remove. Try gentle methods first, like rubbing alcohol or dish soap. If those don’t work, consider seeking professional help to prevent further damage.
- Can I repaint my vinyl seats after removing the paint? Repainting vinyl seats requires special paint and proper preparation to ensure durability. Consult with experts or follow manufacturer guidelines if you plan to repaint your seats.
- How often should I clean and condition my vinyl seats to maintain their appearance? Regular cleaning and conditioning every few months are recommended to keep vinyl seats looking their best. However, the frequency might vary based on usage and exposure to factors like sunlight and spills.
Conclusion:
Dealing with paint on vinyl seats may seem tough, but it’s manageable. Whether you go for rubbing alcohol, a heat gun, or other methods, patience and care are key. And don’t forget prevention shields from splatters, regular cleaning, and proper conditioning go a long way. By following these tips, you can easily remove paint from your vinyl seats’ & get back its charm and comfort.